Hey there! As a supplier of the 4W - 0697, I often get asked if this product is easy to disassemble. Well, let's dive right into it and explore this question from different angles.
First off, let me give you a bit of background on the 4W - 0697. It's a product that's designed with a specific set of functions in mind, and its design naturally impacts how easy it is to take apart. When we look at the general architecture of the 4W - 0697, we can see that it's a well - engineered item. The components are put together in a way that ensures stability and functionality during normal operations.
One of the things that works in favor of easy disassembly is the modular design. The 4W - 0697 is made up of several distinct modules. Each module is like a little building block within the whole system. This modular setup means that if you need to access a particular part of the product, you can usually target that specific module without having to mess around with the entire device. For example, if there's an issue with a particular sensor or circuit within the product, you can isolate that module and start the disassembly process there.
Another factor is the use of standard fasteners. The manufacturer has opted to use commonly - found screws, nuts, and bolts throughout the construction of the 4W - 0697. This is a huge plus because it means that you don't need any specialized tools to take it apart. A regular set of screwdrivers and wrenches from your basic toolbox should do the job. You won't be running around trying to find a unique or hard - to - come - by tool just to disassemble a single part of the product.
However, it's not all sunshine and rainbows. There are a few aspects that make the disassembly process a little more challenging. For one, some of the internal components are packed quite tightly. This is done to save space and improve the overall efficiency of the product. But when it comes to disassembly, it can be a bit of a headache. You might find yourself having to be extra careful not to damage any of the delicate parts while trying to pry them loose.
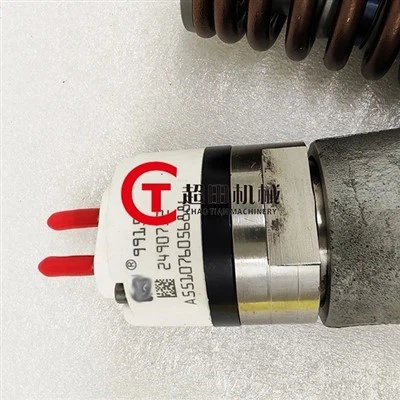
Also, the 4W - 0697 has some wiring harnesses that are intricately connected. These wires are responsible for transmitting data and power between different components. When you're disassembling the product, you need to be very organized about how you handle these wires. You don't want to accidentally pull on a wire and damage a connection or short - circuit something. It's a good idea to take pictures or make notes about the wiring layout before you start taking things apart.
Now, let's talk about the disassembly process step - by - step. First, you need to make sure that the product is completely powered off. This is a safety measure to prevent any electrical shocks or damage to the internal circuits. Once it's off, you can start by removing the outer casing. This usually involves unscrewing a few screws that hold the casing in place. After the casing is off, you'll have a better view of the internal modules.
Next, you can identify the module or component that you need to access. If it's a simple replacement or repair, you might only need to focus on one particular module. As mentioned earlier, you'll use your standard tools to remove the fasteners holding that module in place. Once the module is loose, you can carefully lift it out, being mindful of any wiring connections.
If you're dealing with the wiring, you'll need to gently unplug the connectors. Some connectors might have a locking mechanism, so you'll need to release that before you can pull the connection apart. And again, keep track of where each wire goes.


In comparison to some of our other products, like the 349 - 6530 Starter Motor For C9.3 C15 Engine, the 4W - 0697 has its own unique disassembly challenges. The starter motor is designed more for easy maintenance on an engine, so its disassembly is more focused on engine - related access points. On the other hand, the 4W - 0697 is a different type of product with its own internal structure and requirements.
Similarly, our 24V 11T Starter Motor T400268 for 1004 1006 Engine is also engineered with engine - specific functionality. Disassembling this starter motor involves dealing with engine - mounting points and different electrical configurations compared to the 4W - 0697.
Another product in our lineup is the 237 - 1962 C9 Engine Starter Motor 24V. This starter motor is tailored to the C9 engine, and its disassembly process is centered around fitting and removing it from that particular engine setup.
To sum it up, the 4W - 0697 has both aspects that make disassembly easy and some that make it a tad more difficult. The modular design and use of standard fasteners are in its favor, but the tight internal components and complex wiring definitely add some challenges.
If you're involved in any repair, maintenance, or customization projects and need the 4W - 0697 or any of our other products, don't hesitate to reach out. We're here to help you with all your requirements and can provide you with the best solutions. Whether you're a professional in the field or a DIY enthusiast, we've got you covered. So, come and have a chat with us to discuss your procurement needs.
References
- Manufacturer's manual for 4W - 0697
- Product documentation for 349 - 6530 Starter Motor For C9.3 C15 Engine
- Product details for 24V 11T Starter Motor T400268 for 1004 1006 Engine
- Technical specifications for 237 - 1962 C9 Engine Starter Motor 24V