Hey there, fellow gearheads and vehicle enthusiasts! I'm an alternator supplier, and today I'm gonna walk you through the process of upgrading an alternator to a high-output one. Whether you're running a souped-up car with a bunch of power-hungry accessories or just need more juice for your heavy-duty equipment, this guide is for you.
Why Upgrade to a High-Output Alternator?
Before we dive into the nitty-gritty of the upgrade process, let's talk about why you might want to make the switch. A standard alternator is designed to meet the basic electrical needs of your vehicle, like powering the lights, radio, and ignition system. But if you've added aftermarket components such as high-powered sound systems, winches, or auxiliary lighting, your stock alternator might struggle to keep up.
A high-output alternator, on the other hand, can generate more electrical current than a standard one. This means it can handle the increased demand from your additional accessories without overworking or draining your battery. It also helps maintain a stable voltage, which is crucial for the proper functioning of your vehicle's electrical system.
Assessing Your Needs
The first step in upgrading your alternator is to figure out how much power you actually need. Start by making a list of all the electrical accessories you have or plan to install in your vehicle. Check the power ratings (usually in amps) of each component and add them up. This will give you an idea of the total electrical load your alternator needs to support.
Keep in mind that your vehicle's existing electrical system also has a baseline demand. The engine control unit, fuel injectors, and other essential components all draw power. So, you'll need to factor in this base load when calculating your total power requirements.
Choosing the Right High-Output Alternator
Once you know how much power you need, it's time to find the right high-output alternator for your vehicle. There are a few things to consider when making your selection:
- Amperage Rating: This is the most important factor. Make sure the alternator you choose can deliver at least as many amps as your total power requirements. You might even want to go a bit higher to allow for future upgrades.
- Voltage: Most vehicles operate on a 12-volt electrical system, but some heavy-duty equipment uses 24 volts. Make sure the alternator you select matches the voltage of your vehicle.
- Physical Size and Mounting: High-output alternators come in different sizes and shapes. Make sure the alternator you choose will fit in the space available in your engine compartment and that it has the correct mounting points.
As an alternator supplier, I can recommend some great options. For example, the 035000-4190 01-35-7000 Alternator 24V 50A 8PK for DH220-5 DB58 is a great choice for heavy-duty applications. It's designed to deliver a reliable 50 amps of power at 24 volts, making it suitable for a variety of equipment.
If you're looking for an alternator for your excavator, the PC200 PC240 Excavator Parts 600-861-6420 6D107 Engine Alternator is a top-notch option. It's specifically designed to meet the power needs of these popular excavator models.
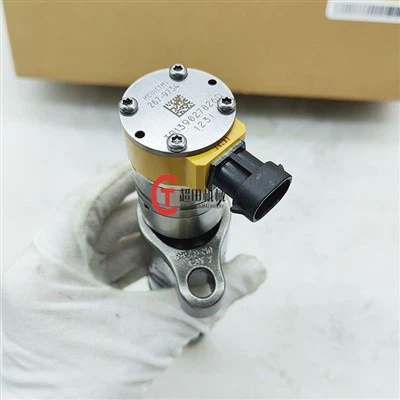
And for those with engines like the 3116, 3512, or 3516B, the 333-1184 Alternator for Engine 3116 3512 3516B is a reliable choice that can deliver the power you need.
Preparing for the Upgrade
Before you start installing your new high-output alternator, it's important to take some precautions. First, disconnect the negative terminal of your vehicle's battery to prevent any electrical shocks or short circuits. You'll also want to gather all the tools you'll need for the job, such as wrenches, sockets, and a serpentine belt tool.


It's a good idea to review your vehicle's service manual or watch some online tutorials to familiarize yourself with the alternator replacement process. Each vehicle is different, so it's important to understand the specific steps involved in your case.
Installing the High-Output Alternator
Now that you're prepared, it's time to install your new alternator. Here's a general overview of the process:
- Remove the Old Alternator: Start by removing the serpentine belt from the alternator pulley. You may need to use a serpentine belt tool to release the tension on the belt. Next, disconnect the electrical connections from the alternator. These usually include the battery cable, the voltage regulator wire, and any other auxiliary wires. Finally, remove the mounting bolts that hold the alternator in place and carefully lift it out of the engine compartment.
- Prepare the New Alternator: Before installing the new alternator, make sure it's clean and free of any debris. Check the pulley to ensure it's in good condition and properly aligned. You may also want to apply a small amount of dielectric grease to the electrical connections to prevent corrosion.
- Install the New Alternator: Place the new alternator in the same position as the old one and secure it with the mounting bolts. Make sure the alternator is tightly fastened to prevent any vibrations or movement. Reconnect the electrical connections, making sure to attach them to the correct terminals. Finally, reinstall the serpentine belt on the alternator pulley and adjust the tension as needed.
- Test the System: Once the new alternator is installed, reconnect the negative terminal of your vehicle's battery. Start the engine and check the electrical system for any signs of problems. Use a voltmeter to measure the voltage at the battery terminals. It should read between 13.5 and 14.5 volts when the engine is running. If the voltage is too high or too low, there may be an issue with the alternator or the electrical system.
Post-Installation Checks
After installing the new alternator, it's important to perform some post-installation checks to ensure everything is working properly. Here are a few things to look out for:
- Battery Charging: Monitor the battery charge level over the next few days. If the battery isn't charging properly, there may be an issue with the alternator or the charging system.
- Electrical Accessories: Test all of your electrical accessories to make sure they're working correctly. Pay attention to any signs of dim lights, weak audio, or other electrical problems.
- Noise and Vibrations: Listen for any unusual noises or vibrations coming from the alternator. This could indicate a problem with the mounting or the pulley.
Maintenance and Care
Once your high-output alternator is installed and working properly, it's important to take good care of it to ensure its longevity. Here are a few maintenance tips:
- Keep it Clean: Regularly clean the alternator to remove any dirt, debris, or oil that may accumulate on it. This will help prevent overheating and corrosion.
- Check the Belt Tension: Periodically check the tension of the serpentine belt that drives the alternator. A loose belt can cause the alternator to slip, reducing its efficiency.
- Inspect the Electrical Connections: Check the electrical connections to the alternator for any signs of corrosion or loose wires. Tighten any loose connections and clean any corroded terminals.
Conclusion
Upgrading to a high-output alternator is a great way to ensure your vehicle has the power it needs to run all of your electrical accessories. By following the steps outlined in this guide, you can install a high-output alternator safely and effectively.
If you have any questions or need help choosing the right alternator for your vehicle, don't hesitate to reach out. As an alternator supplier, I'm here to assist you with all your alternator needs. Whether you're looking for a specific model or need advice on installation, I'm just a message away. Let's start a conversation and get your vehicle's electrical system up to par!
References
- Haynes Repair Manuals
- Chilton Automotive Repair Manuals
- Vehicle manufacturer's service manuals